Showing posts with label Things I've made. Show all posts

Friday, 13 November 2015

Christmas Advent Calendar

I have finally completed the Advent Calendar, albeit a little later than anticipated. It’s made up of 23 little houses each forming a little pocket which can be filled with a small treat. I couldn’t decide what sort of house to sew for Day 24, my husband suggested a church, and so a church it became, complete with spire and a real bell, and most importantly, a bigger pocket for an extra big treat!

Much to my youngest child’s disappointment the Advent Calendar is not staying with us but is to be raffled off in aid of the charity Kids for Kids which exists to help children living in remote villages of Darfur, Sudan who live lives of inexcusable and unimaginable hardship. The charity adopts whole villages, lifting them out of abject poverty through long term, self-sustainable grass roots projects identified and run by the villagers themselves.  

You can find out more information about the raffle on our Facebook page. We're encourging people to share our Facebook post, as even if you are not local enough to participage in the raffle it would be great to get the word out about Kids for Kids and the tremendous work they do.


Sunday, 1 March 2015

Great British Sewing Bee Draped Top

I have to say I'm really pleased with how my Draped Top turned out. 

This is my first make from the second book from the Great British Sewing Bee 'Sew Your Own Wardrobe'. In the accompanying pattern instructions it says 'one size fits most'. I was a bit apprehensive about what the finished garment would look like. I've made a few of these 'one-size' halterneck tops in the past and always found them to be rather on the large size and a bit shapeless. However, the Draped Top surprised me. I made no alterations to the pattern and it's almost a perfect fit. I'm a size 8 so would treat with caution the 'one size fits most' advice. Saying that, it is a very simple pattern and would be easy enough to size up. 


I definitely will be making another although next time I will add a couple inches to the length, as even though I am only 5'2 I still ended up having to make the tiniest of seams in order for it to just cover my waist! I would also make the neck tie a little longer so that it drapes nicely down the back. All in all though it's a lovely summer top. If you have a spare couple of hours and a metre of fabric, go for it!

Oh, I almost forgot the best bit about this top is that the back is high enough that you can wear a strapless bra beneath without it showing ;)

Tuesday, 11 November 2014

Cherry Blossom Festival Sakura Doll

This very sweet Kokeshi Doll is from the Cherry Blossom Festival collection by Benartex. The pattern together with the sewing instructions are pre-printed on the panel. Just cut around the dotted line and sew! She even comes with a sweet bow to attach to her back.


http://www.belovedfabrics.co.uk/benartex--cherry-blossom-festival--sakura-doll-2958-p.asp

Friday, 15 August 2014

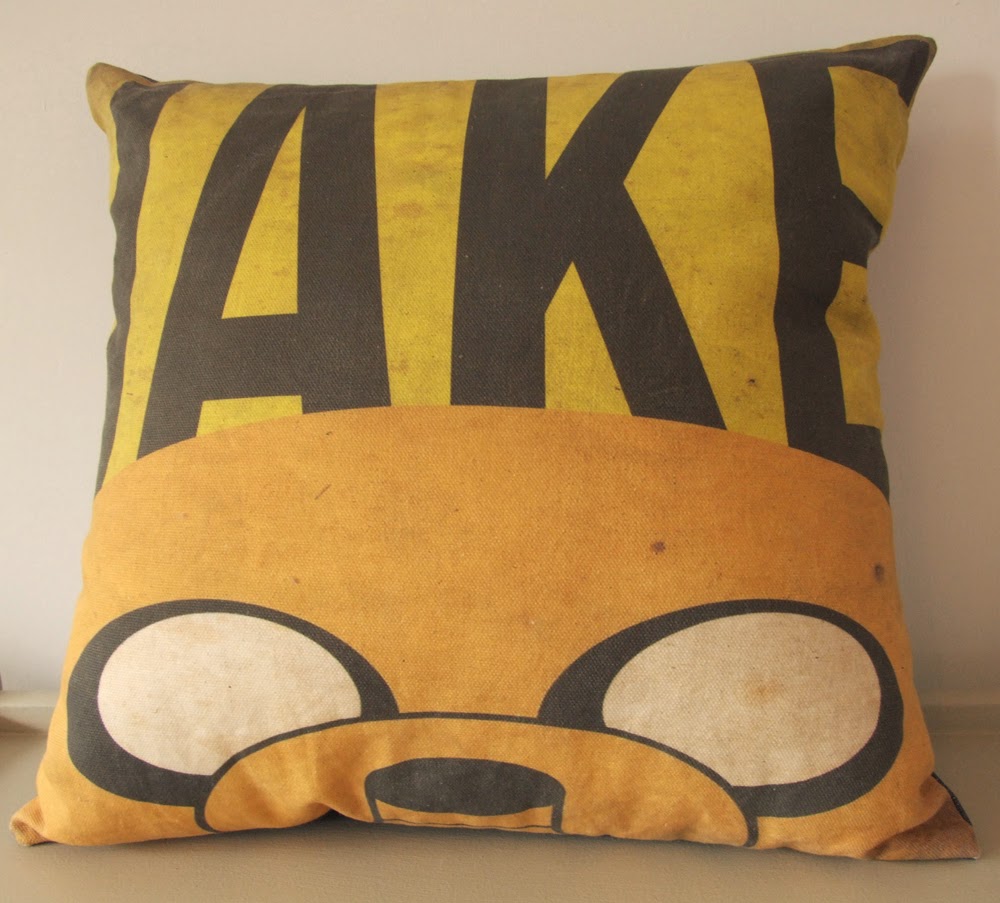
Adventure Time Pillows

My kids are HUGE Adventure Time fans. For those of you who have never heard of Adventure Time it’s an America TV series which follows the adventures of Finn, a human boy and his best friend Jake, a dog with magical powers.

For their birthdays this year I made them each a pillow from these Finn and Jake fabric panels I found on Etsy. They are designed and printed by 'This Shop Really Rocks'. I think their style and offering is pretty unique, from Game of Thrones to Doctor Who and Alice in Wonderland. Check them out at: www.etsy.com/uk/shop/ThisShopReallyRocks


Thursday, 10 April 2014

Quirky Handmade Bow Ties

We are now selling handmade Bow Ties. They are pre-tied and come with a fully adjustable neck strap. This one is called Prosperity Hens. Priced at £12.95 they will be available from today at Gorgeous Gerties in West Street, Dorking. They can also be made to order in any of our fabrics so you can be as quirky as you like. You can view our full range of fabrics here. If you are not local however, please feel free to contact us if you would like one made for you. 


Tuesday, 12 November 2013

Meet Owlivia

Meet Owlivia! This very cute owl cushion comes as a pre-printed sewing panel. The panel contains all the fabric pieces and instructions you need to make your own Owlivia.  It would make a great beginners sewing project. You just need to add stuffing and buttons.  The finished cushion measures approximately 43cm high by 30cm wide. Available online or instore from Gorgeous Gerties.


We also have two gorgeous co-ordinating fabrics in stock from the Owlivia collection. 


Boiled Wool Hearts

Is it still too early to mention Christmas decorations? Our handmade boiled wool hearts available from Gorgeous Gerties.

Tuesday, 10 September 2013

Pincushion Sundaes

Our yummy handmade Pincushion Sundaes, delivered to Gorgeous Gerties this morning!


Monday, 9 September 2013

Hints and tips for making your own knickers

Over the last few weeks I have been very busy sewing knickers for my display at Gorgeous Gerties


The knicker pattern I used is by Trixie Lixie. It's a multi-size pattern with size lines in three different sizes: Small (8-10); Medium (12-14) and Large (16-18). There are diagrams to accompany the pattern instructions, which are pretty straightfoward. However, if like me you prefer visual instruction, there's a very good How To video here.

Below I am sharing a few tips you may also find useful when making up your own pair of knickers.

Firstly, if your fabric is not square, square it off by folding in half making sure the pattern is aligned. This makes it easier to gauge whether or not your pattern is straight. 


Cut out your pattern and place it diagonally across your fabric. This will give your knickers a bit of stretch. To ensure your pattern is straight, measure the grain line against your straight edge. Cut around the pattern using sharp scissors. Don't fret, but at this point your un-sewn knickers will look surprisingly huge!


Next cut out your gusset from a piece of jersey fabric. 

When sewing your knickers together I would recommend using a polyester thread to give you that extra bit of stretch. In the pattern instructions it says to place the knicker back and front (with right sides together) and lay the gusset over the top, remembering to allow a 1cm overlap. However, I found it easier to flip the knickers over and place the knicker front and back (right sides together) on top of the gusset. Once I was happy that the gusset overlap was straight I pinned all three layers together and sewed across the stitch line. 


Next fold the gusset overlap over. To create a neat seam I found it helpful to iron the gusset overlap before stitching.


Once I had sewn the gusset overlap I found I was left with a triangle of excess fabric either end of the seam. Just snip these off.


Using a zig zag stitch sew both sides of the gusset to the fabric. If like me, after stitching the first side of your gusset you find that the jersey fabric has stretched a little then just cut the excess fabric away so that the opposite side edge of your gusset is aligned to your fabric. I found it easier to do this bit using a rotary cutter but a good pair of sharp dressmaking shears will do.


Using a zigzag stitch sew the elastic to the back, front and sides of your knickers.  Ensure the elastic is facing the right way around with the frilly edge facing upwards. When sewing the elastic on to your knickers don’t be afraid to pull the elastic taut as this will give you knickers that nice gathered effect. More importantly, you don’t want to end up with a pair of baggy knickers!

Note: If you are using a contrasting trim for your knickers it’s worth matching your top and bottom threads to create a nice seam both on the inside and outside.


Pin your seams together, matching up the bottom and top edges of the elastic trim. If you are having trouble getting your edges to line up insert a couple of holding stitches in a contrasting thread to hold the seams together while you sew them.


To finish, add a small satin bow to the front of your knickers.


Saturday, 10 August 2013

Amy Butler's Sun Surf Halter

So, I finally got around to making my Amy Butler Sun Surf Halter and I'm pretty pleased with how it turned out. The pattern was really straightforward. I wasn't keen on the keyhole opening detail on the front, so decided to leave this out. I ended up taking out the lining too, as I found it bunched up too much around the neckline. The fabric used was Petite Nosegays from the Sweet Shoppe collection by Benartex. All in all I think it makes a great summer top and the back isn't too low either. This is definitely one pattern I will be using again. In fact number 2 is already cut and waiting to be sewn...